This lab assignment will have you write a jython program that will display the same picture 4 times on a canvas.
In the ACCC Labs, JES can be found by:
This function will create an empty picture of the width and height specified by the two input values. To use this option you will need to figure out (or guess) at how large you will want your finished collage to be.
We have created the image 7x95in.jpg to act as this existing blank image. It was created in Photoshop and is 7 inches wide and 9.5 inches high (according to Photoshop when it was created). This option restricts the size of the final image.
Assume we want to place the image stored in variable opict at position: column = 30, row = 55. This meant that the upper left corner of opict will be at column 30, row 55. We can use the following code. Assume the canvas is in a variable called npict.
   basex = 30
   basey = 55

   for x in range (1, getWidth(opict))
     for y in range (1, getHeight(opict))
       opixel = getPixel (opict, x, y)
       npixel = getPixel (npict, basex+x, basey+y)
       c = getColor (opixel)
       setColor (npixel, c)
You would repeat this operation for every image you wanted
to copy to the canvas.
Create a file using JES that will
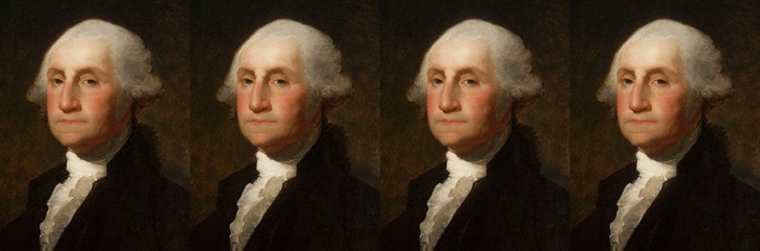
If you want the images lined up horizontally, the canvas will
need to have four times the width of the original image and
the same height as the original image. If the original
image has width of W, the first copy will be at column 1, row 1.
The second image will be a column W, row 1.
The third image will be a column 2*W, row 1.
The fourth image will be a column 3*W, row 1.
For example, look at this image:
If you want the images lined up vertically, the canvas will
need to have four times the height of the original image and
the same width as the original image. If the original
image has height of H, the first copy will be at column 1, row 1.
The second image will be a column 1, row H.
The third image will be a column 1, row 2*H.
The fourth image will be a column 1, row 3*h.
For example, look at this image:

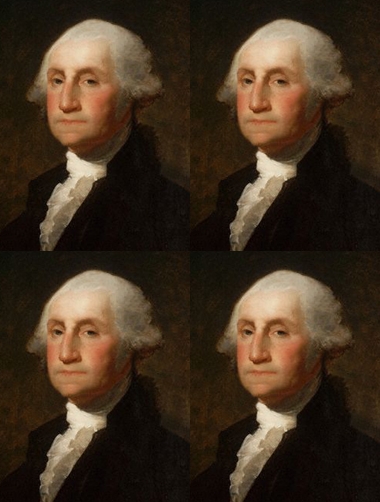
If you want the images lined up in a 2 by 2 grid, the canvas will
need to have two times the width of the original image and
the two time the height of the original image. If the original
image has width of W and height of H,
the first copy will be at column 1, row 1.
The second image will be a column W, row 1.
The third image will be a column 1, row H.
The fourth image will be a column W, row 3*h.
For example, look at this image:
On the ACCC lab computers, the H: drive is a permanent storage area for you. Saving files to this drive on one computer can be accessed from another computer (even another computer in a different lab). It is suggested that you save your python programs to the H: drive.
Use the UNIX turnin command to electronically hand-in your python file using the project name of lab13. Note: you will need to transfer your python file to your icarus account before you can use turnin. You can do this by using the file transfer function of SSH or by emailing your python file to your incarus account. To submit the file in <filename>.py for lab13, the turnin command is entered as:
turnin -c troy -p lab13 <filename>.py
You are invited to post any and all images you create in the discussion board area in blackboard. You can use that area to show the class how creative you are.